Sourcing from ButterCMS
Overview
In this guide you’ll be setting up a CMS powered Gatsby site that uses ButterCMS as its content management system.
To complete this tutorial, you’ll need your own ButterCMS auth token which you can get free here.
ButterCMS is a headless CMS that lets you manage content using their dashboard and integrate it into your tech stack of choice with their content APIs. You can use ButterCMS for new projects as well as add it to existing codebases.
ButterCMS provides a user-friendly UI for managing marketing sites, blogging, and custom content scenarios. It can be used for SEO landing pages, customer case studies, company news & updates, events + webinar pages, education center, location pages, knowledgebases, and more.
ButterCMS is different from a traditional CMS like Drupal or WordPress in that they’re not a large piece of software you need to download, host, customize, and maintain. Instead, they provide consumable, performant content API’s that you add to your application.
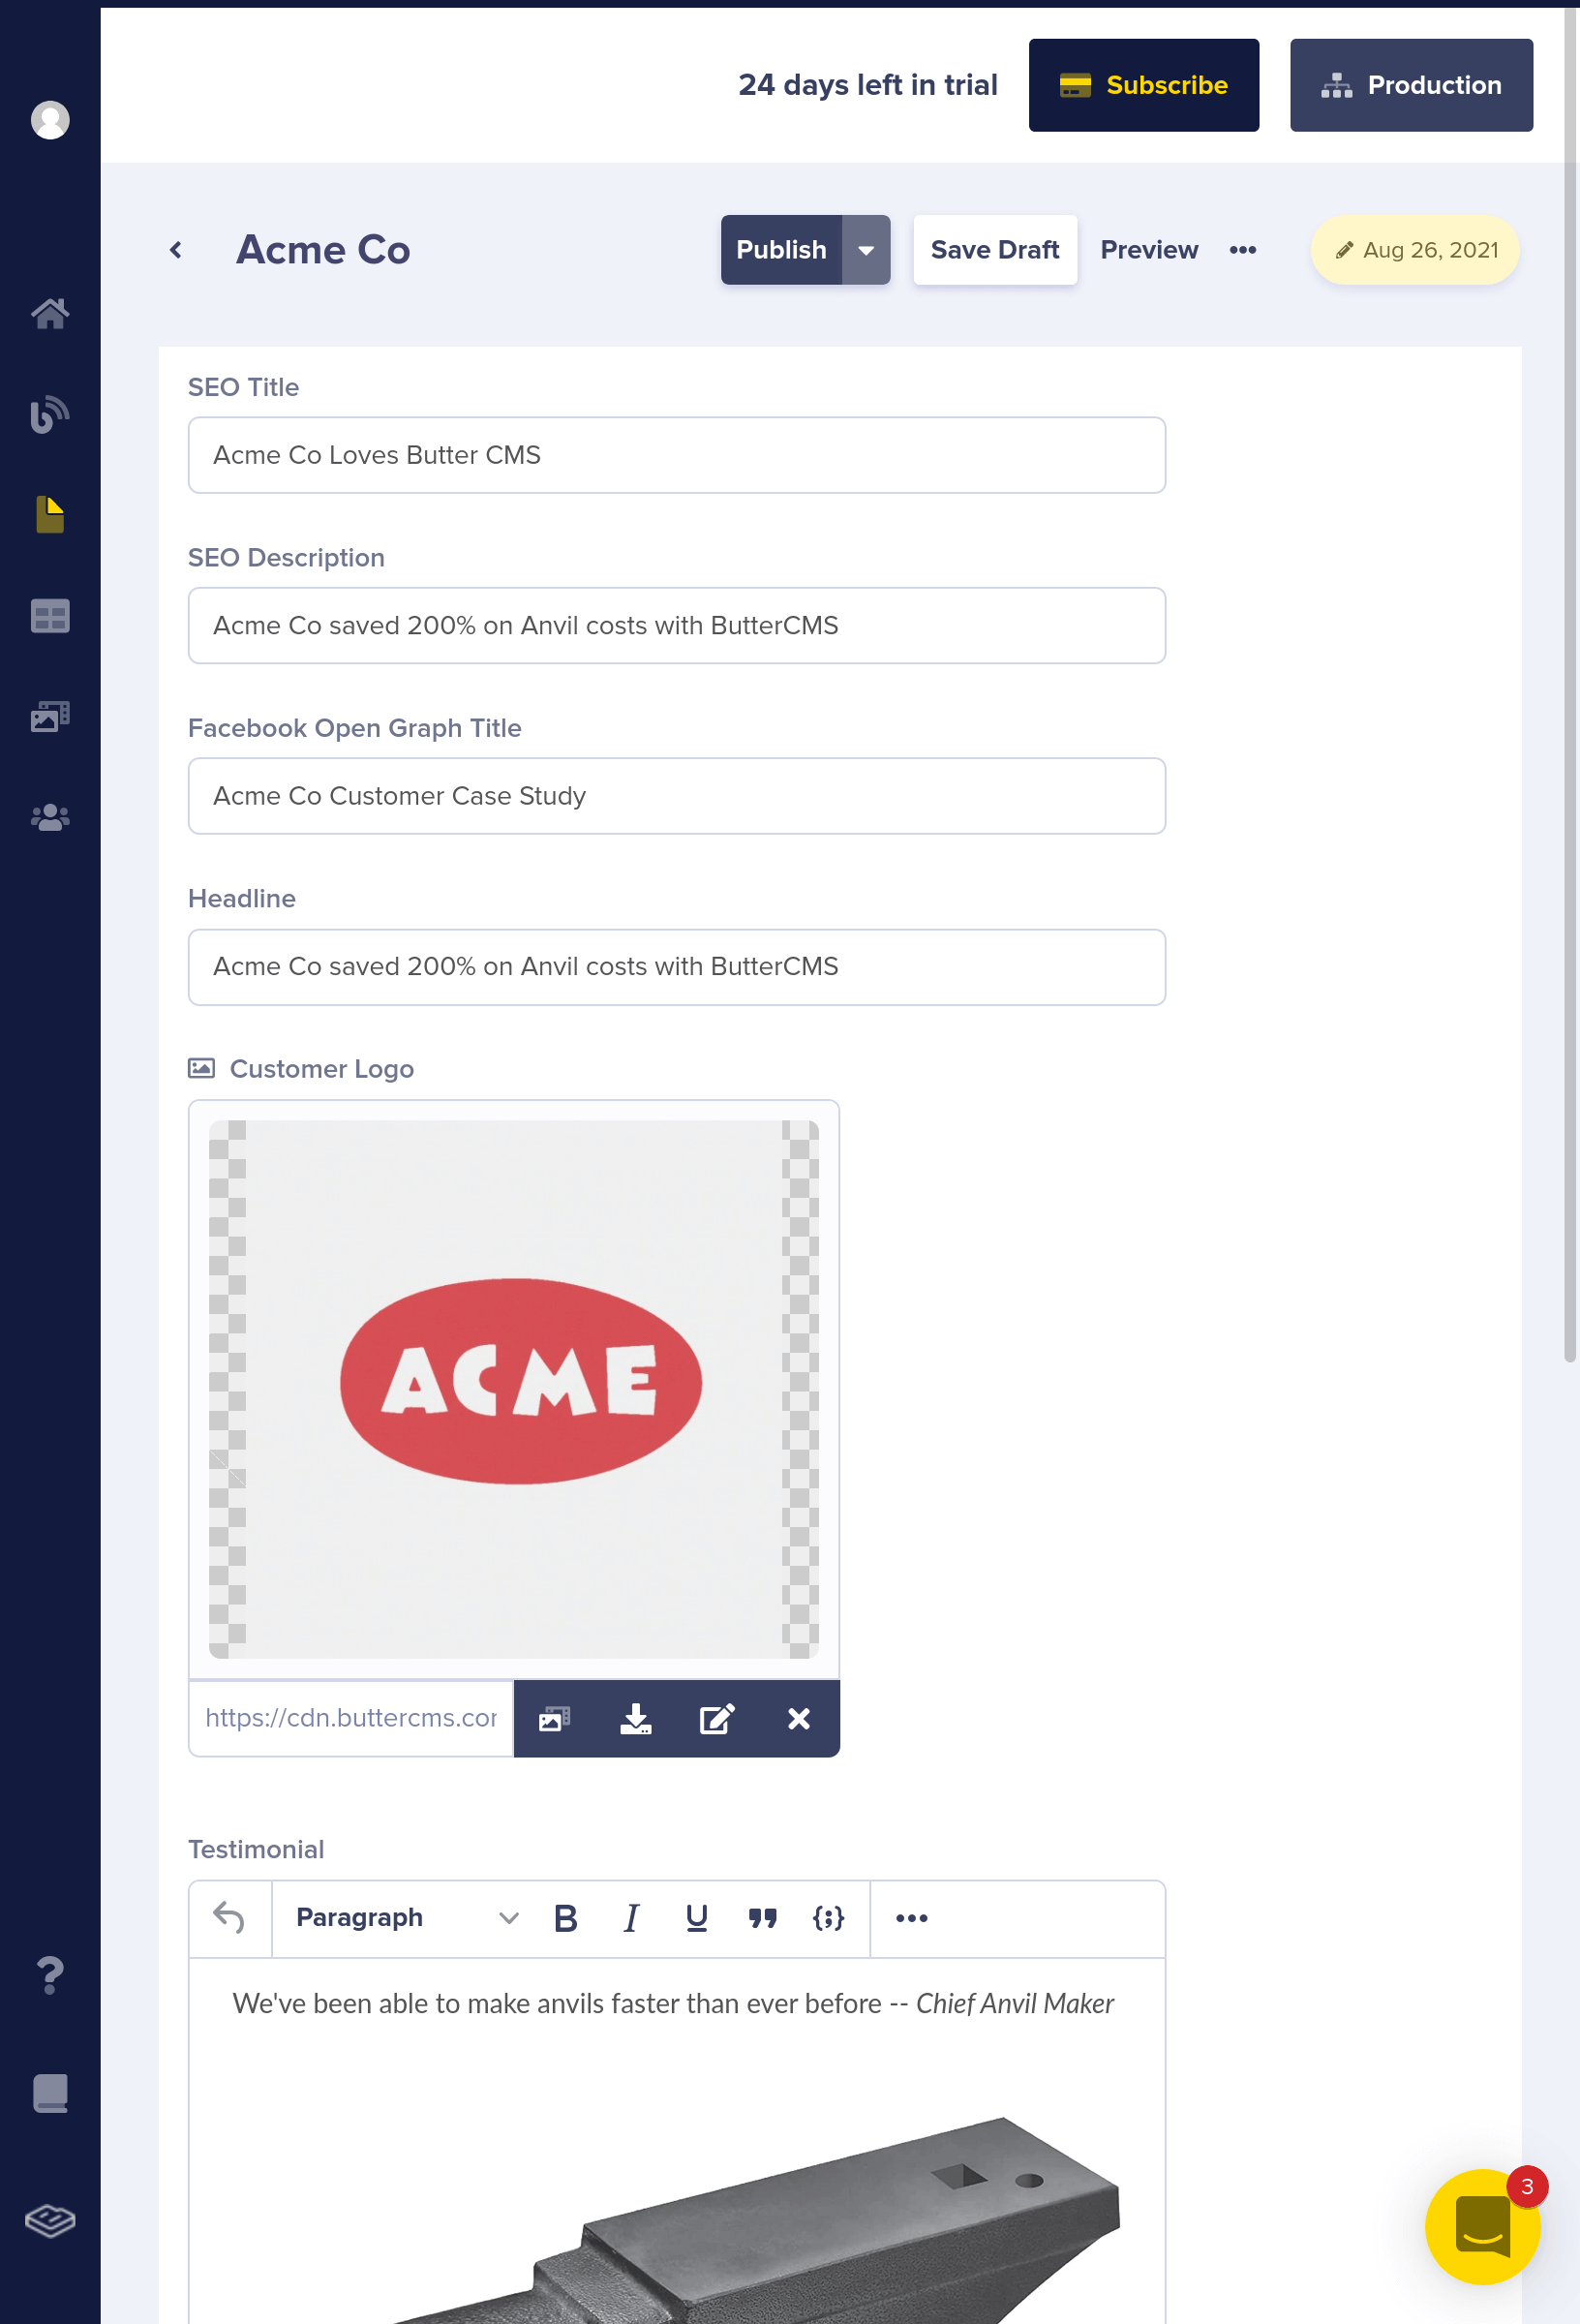
For example, if you wanted to enable a non-technical person to be able to add customer case study pages to your marketing site, you might create a Case Study Page Type to represent these pages. The non-technical person would be able to manage these pages from their dashboard and the JSON API output would look something like this:
Setup
Create a new Gatsby site with the default starter
Run this in your terminal:
gatsby new butter-site
Install the source plugin
npm install gatsby-source-buttercms
Adding configuration
Here you’ll specify the config that will be needed to pull down data from ButterCMS.
Make sure to add your API_TOKEN from your dashboard. In this guide you will be creating faq_items, faq_headline, homepage, customer_case_study as stated in the config below. Do well to change it if you named it something differently.
More details here
ButterCMS starter template
To see a fully complete Gatsby+ButterCMS project check out this Gatsby ButterCMS Starter Project. It contains real world examples of how to use Pages, Posts, and ContentFields.
Usage
Webhooks
Webhooks are a powerful feature that allow you to notify your internal systems whenever content in ButterCMS has changed. Your host platform needs to be notified so that Gatsby can create fresh pages from the new data. You can learn more about Webhooks in this blog post. Checkout your host platform from incoming webhooks so you can hit it anytime your content changes. Netlify lets you generate a build hook that will be triggered by ButterCMS on certain events e.g. when you create or update a blog post, more details here.

Image transformation
ButterCMS has integrated with a rich image transformation API called Filestack. This allows you to modify your uploaded images in dozens of ways. Everything from resizing, cropping, effects, filters, applying watermarks and more. Check out Filestack full documentation for more detail.
After you upload an image to ButterCMS, it’s stored on your CDN. To create a thumbnail, here’s an example:
Original URL = https://cdn.buttercms.com/zjypya5tRny63LqhHQrv
Thumbnail URL = https://fs.buttercms.com/resize=width:200,height:200/zjypya5tRny63LqhHQrv
Resizing is just one of the many different transformations you can do to your images. Refer to the Filestack docs for full details.
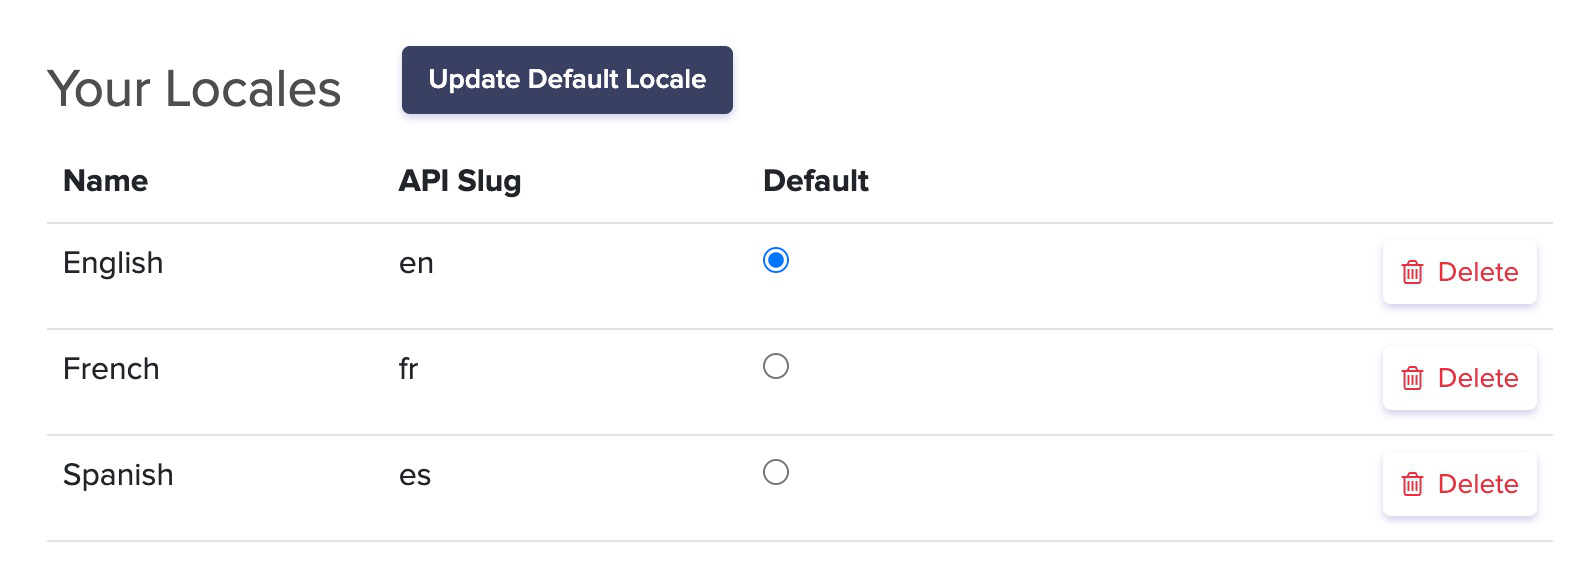
Localization
ButterCMS has full support for localization of your content. Locale names and keys are completely customizable and there’s no limit to the number of locales you can have. View their API Reference to learn how to query by locale.
Creating pages
Creating a single page (home page)
Introduction
Quickly launch a new marketing site or add CMS-powered pages to your existing site using Pages.
Adding a CMS-powered page to your app involves three steps:
- Create the Page structure
- Populate the content
- Integrate into your application
Create the page structure
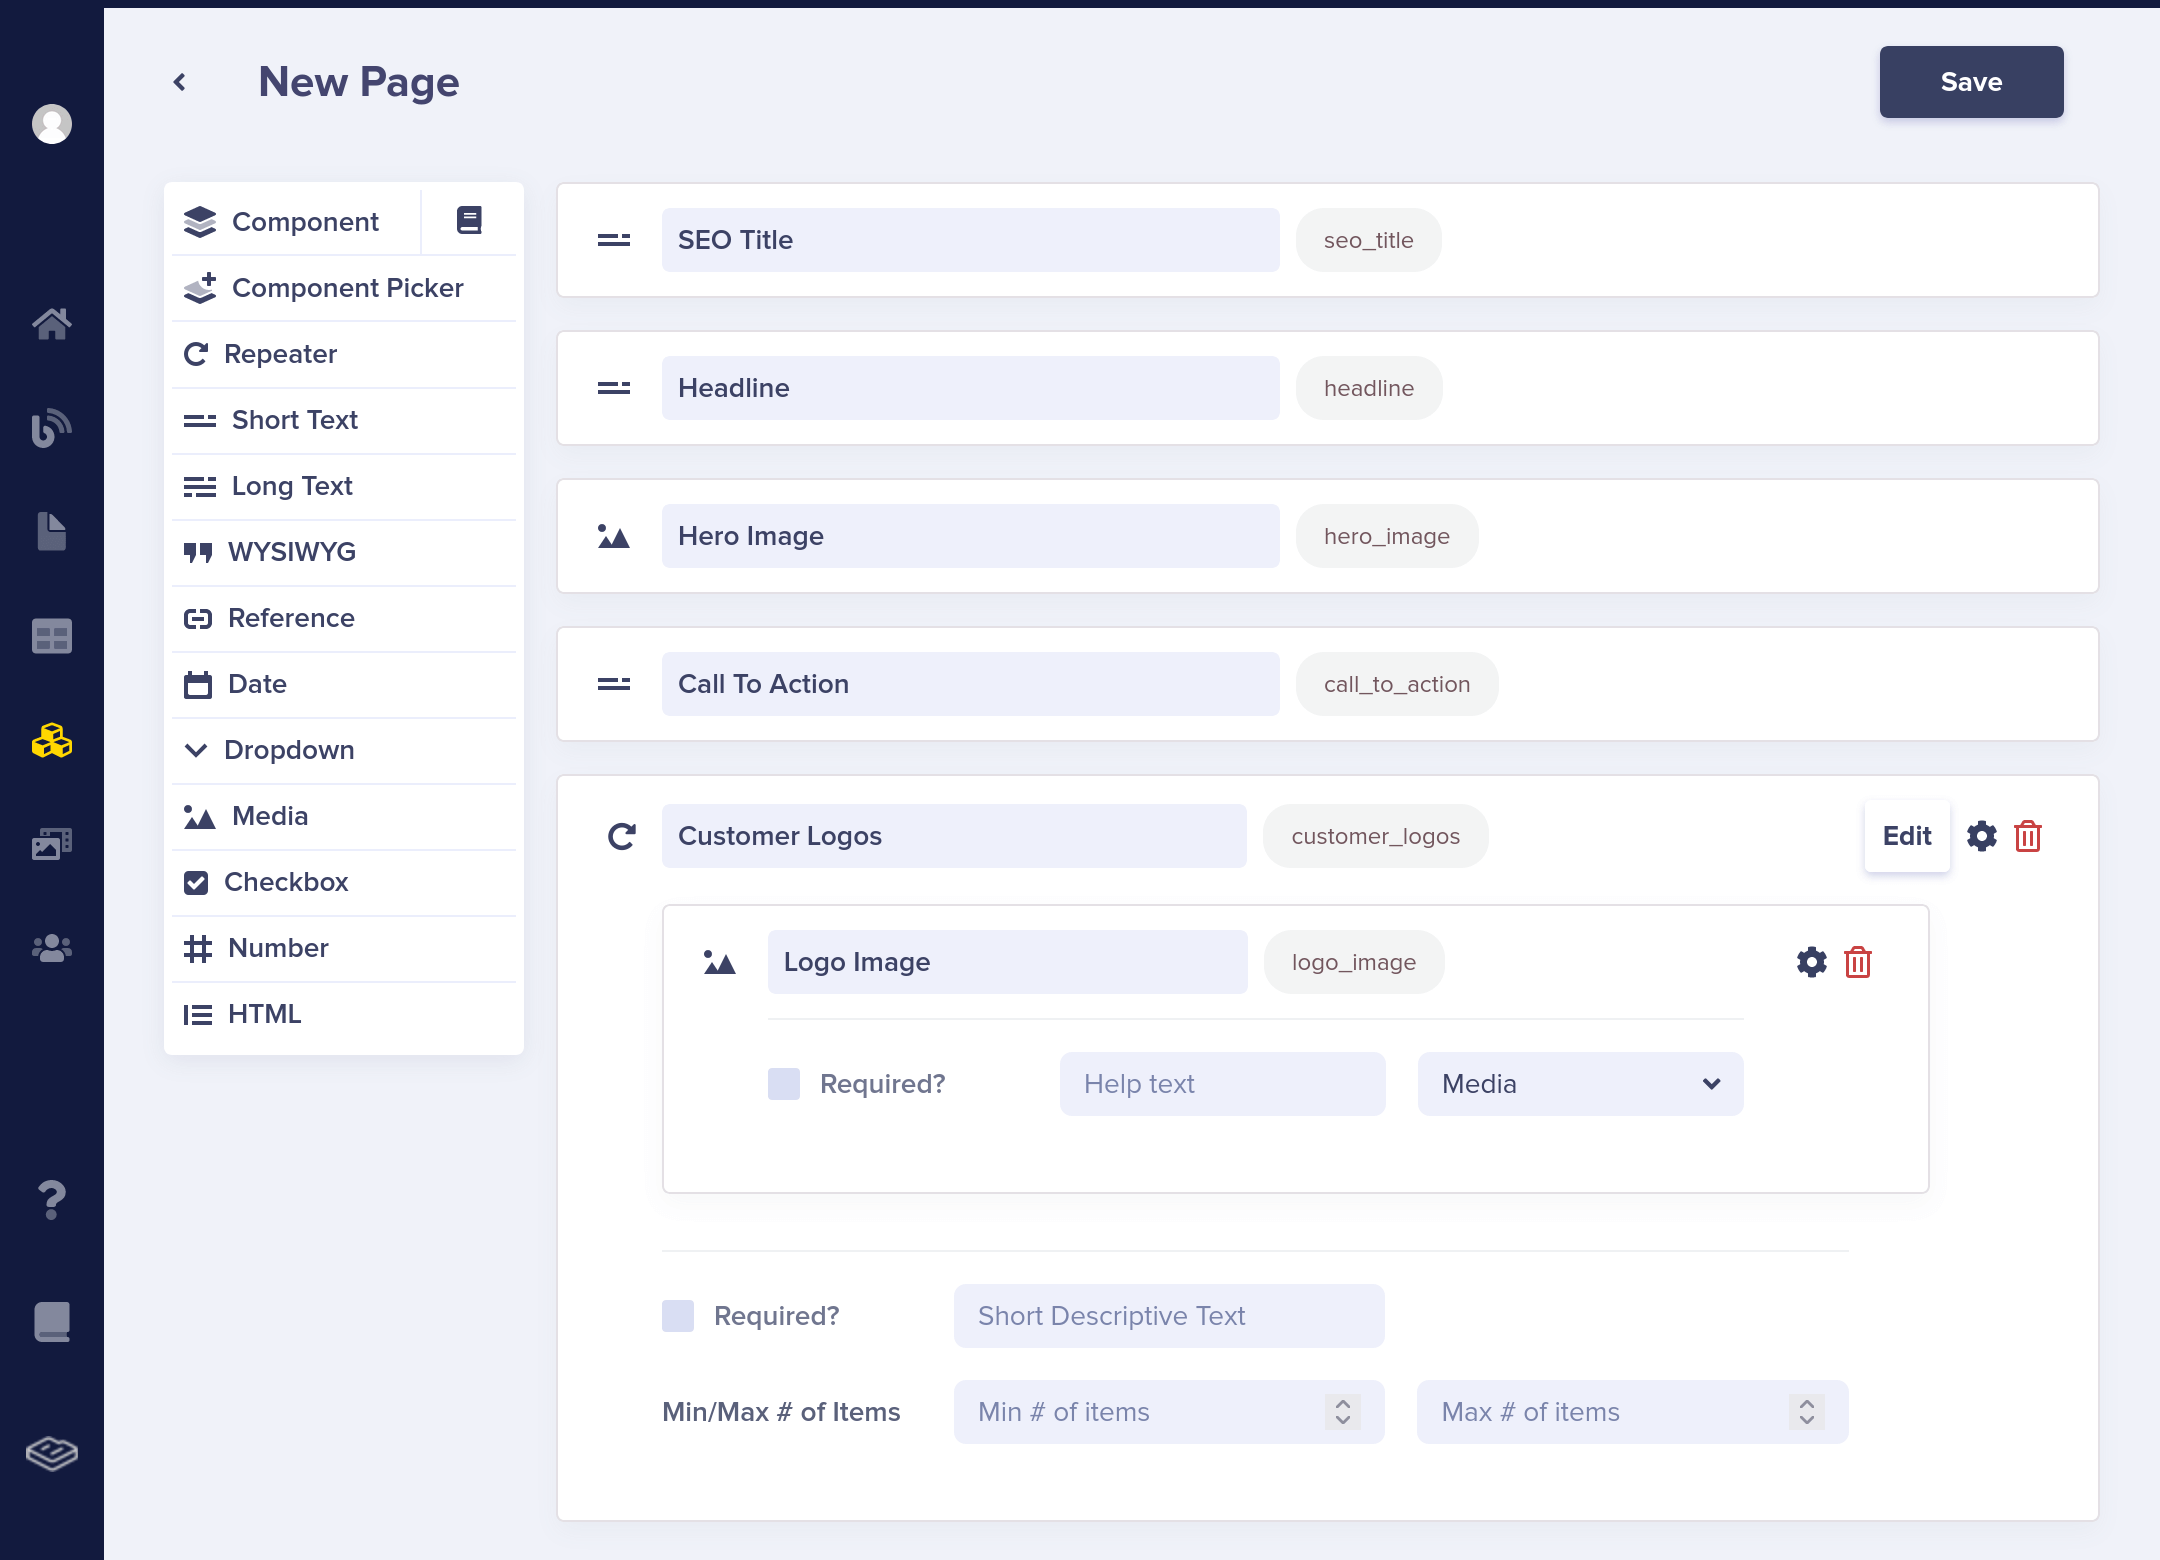
Create a new Page and define its structure using Page Builder. Create an example homepage to follow along with this guide:
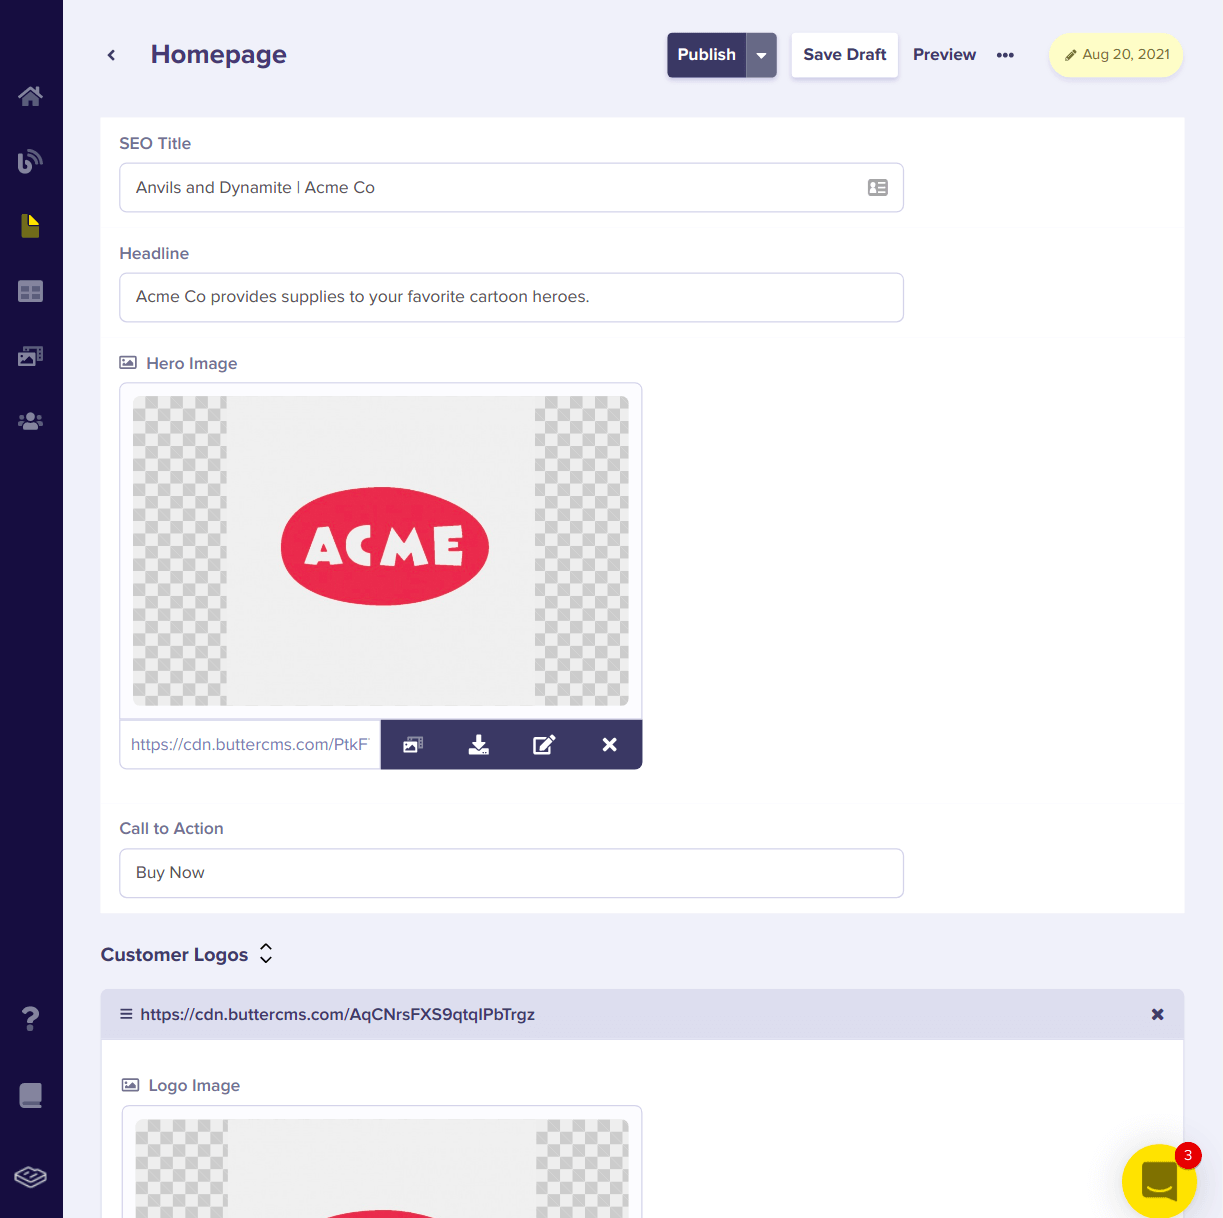
Populate the content
Then populate your new page with content. In the next step, you’ll call the ButterCMS API to retrieve this content from your app.
Integrate into your application
With your homepage defined, the ButterCMS GraphQL query will return some data that looks like this:
Now let’s create the home page:
in your terminal, run
Now open up http://localhost:8000/home to see the home page populated with the content you created on butter.
Create multiple pages using Page Types
Suppose you want to add a set of customer case study pages to your marketing site. They all have the same structure but the content is different. Page Types are perfect for this scenario and involves three steps:
- Create the Page Type structure
- Populate the content
- Integrate into your application
If you need help after reading this, contact ButterCMS via email or livechat.
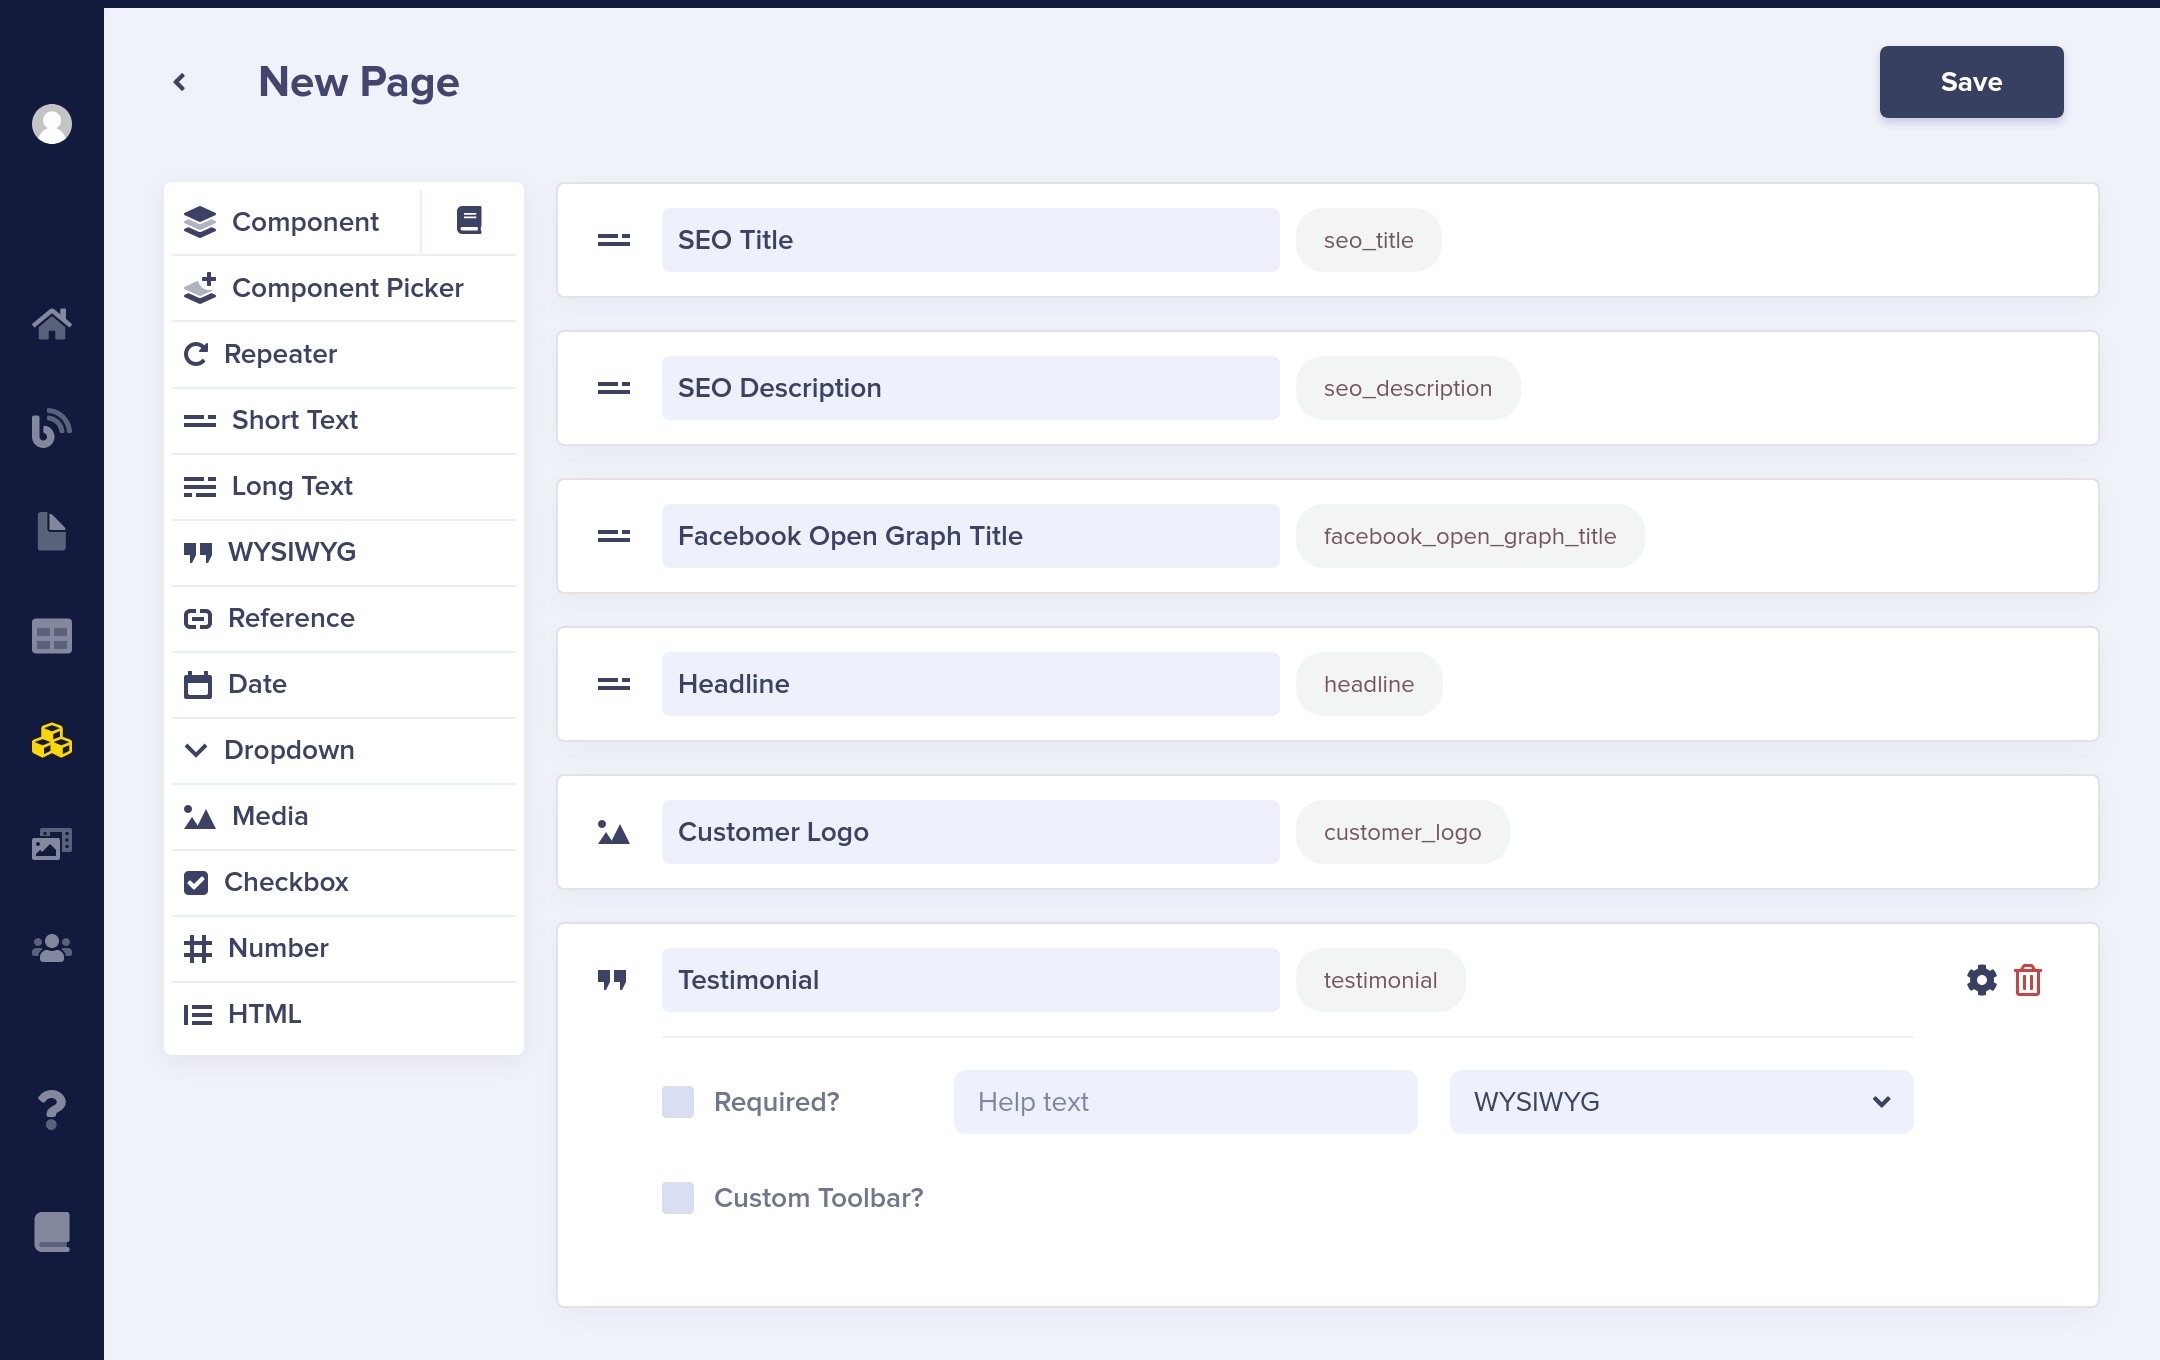
Create the Page Type structure
Create a Page Type to represent your Customer Case Study pages:
After saving, return to the configuration page by clicking the gear icon:
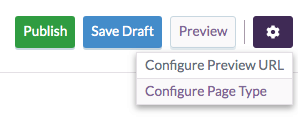
Then click on Create Page Type and name it “Customer Case Study”. This will allow you to reuse this field configuration across multiple customer case study pages:

Populate the content
Then populate the new page with content. In the next step, you’ll call the ButterCMS API to retrieve this content from your app.
To pull down content into Gatsby, run:
Testing with GraphiQL
You can test out your GraphQL queries with GraphiQL (a GraphQL debugger) fire up GraphiQL on http://localhost:8000/___graphql
Once GraphiQL is open, paste the query below :
Integrate into your application
Now refactor the home page to display link(s) to each customer case study page
Next you’ll refactor gatsby-node-js to programmatically create customer case study pages with Gatsby create pages API. First you need to define a customer case study template
Now programmatically create customer case study pages based on the template you defined in src/template/customer-case-study.js
That’s it! Now stop the server and run:
Now the home page should contain links to customer case study pages, click around and
you’ll notice that the template you defined in src/template/customer_case_study.js
was used by Gatsby to create each case study page.
FAQ page example
Suppose you want to add a CMS to a static FAQ page with a title and a list of questions with answers. Most websites have a FAQ (Frequently Asked Questions) page. ButterCMS makes it possible to create such content with Collections. Now you’ll create a collection named FAQshaving a question and answer field.
Set up content fields
Making your content dynamic with Butter is a two-step process:
- Setup custom content fields in Butter
- Integrate the fields into your application
- To set up custom content fields, first sign in to the Butter dashboard.
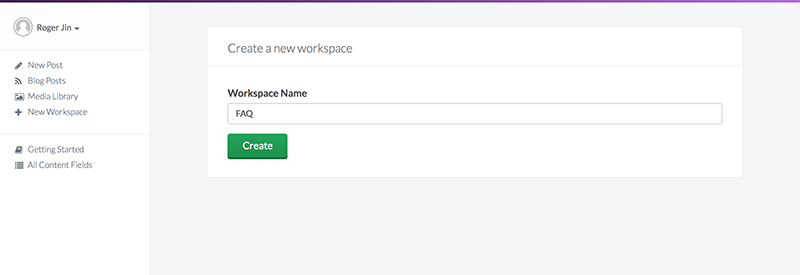
Create a new workspace or click on an existing one. Workspaces let you organize content fields in a friendly way for content editors and have no effect on development or the API. For example, a real-estate website might have a workspace called “Properties” and another called “About Page”.
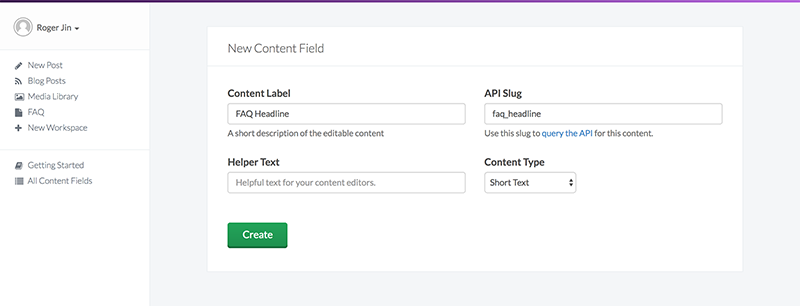
Once you’re in a workspace click the button to create a new content field. Choose the “Object” type and name the field “FAQ Headline”:
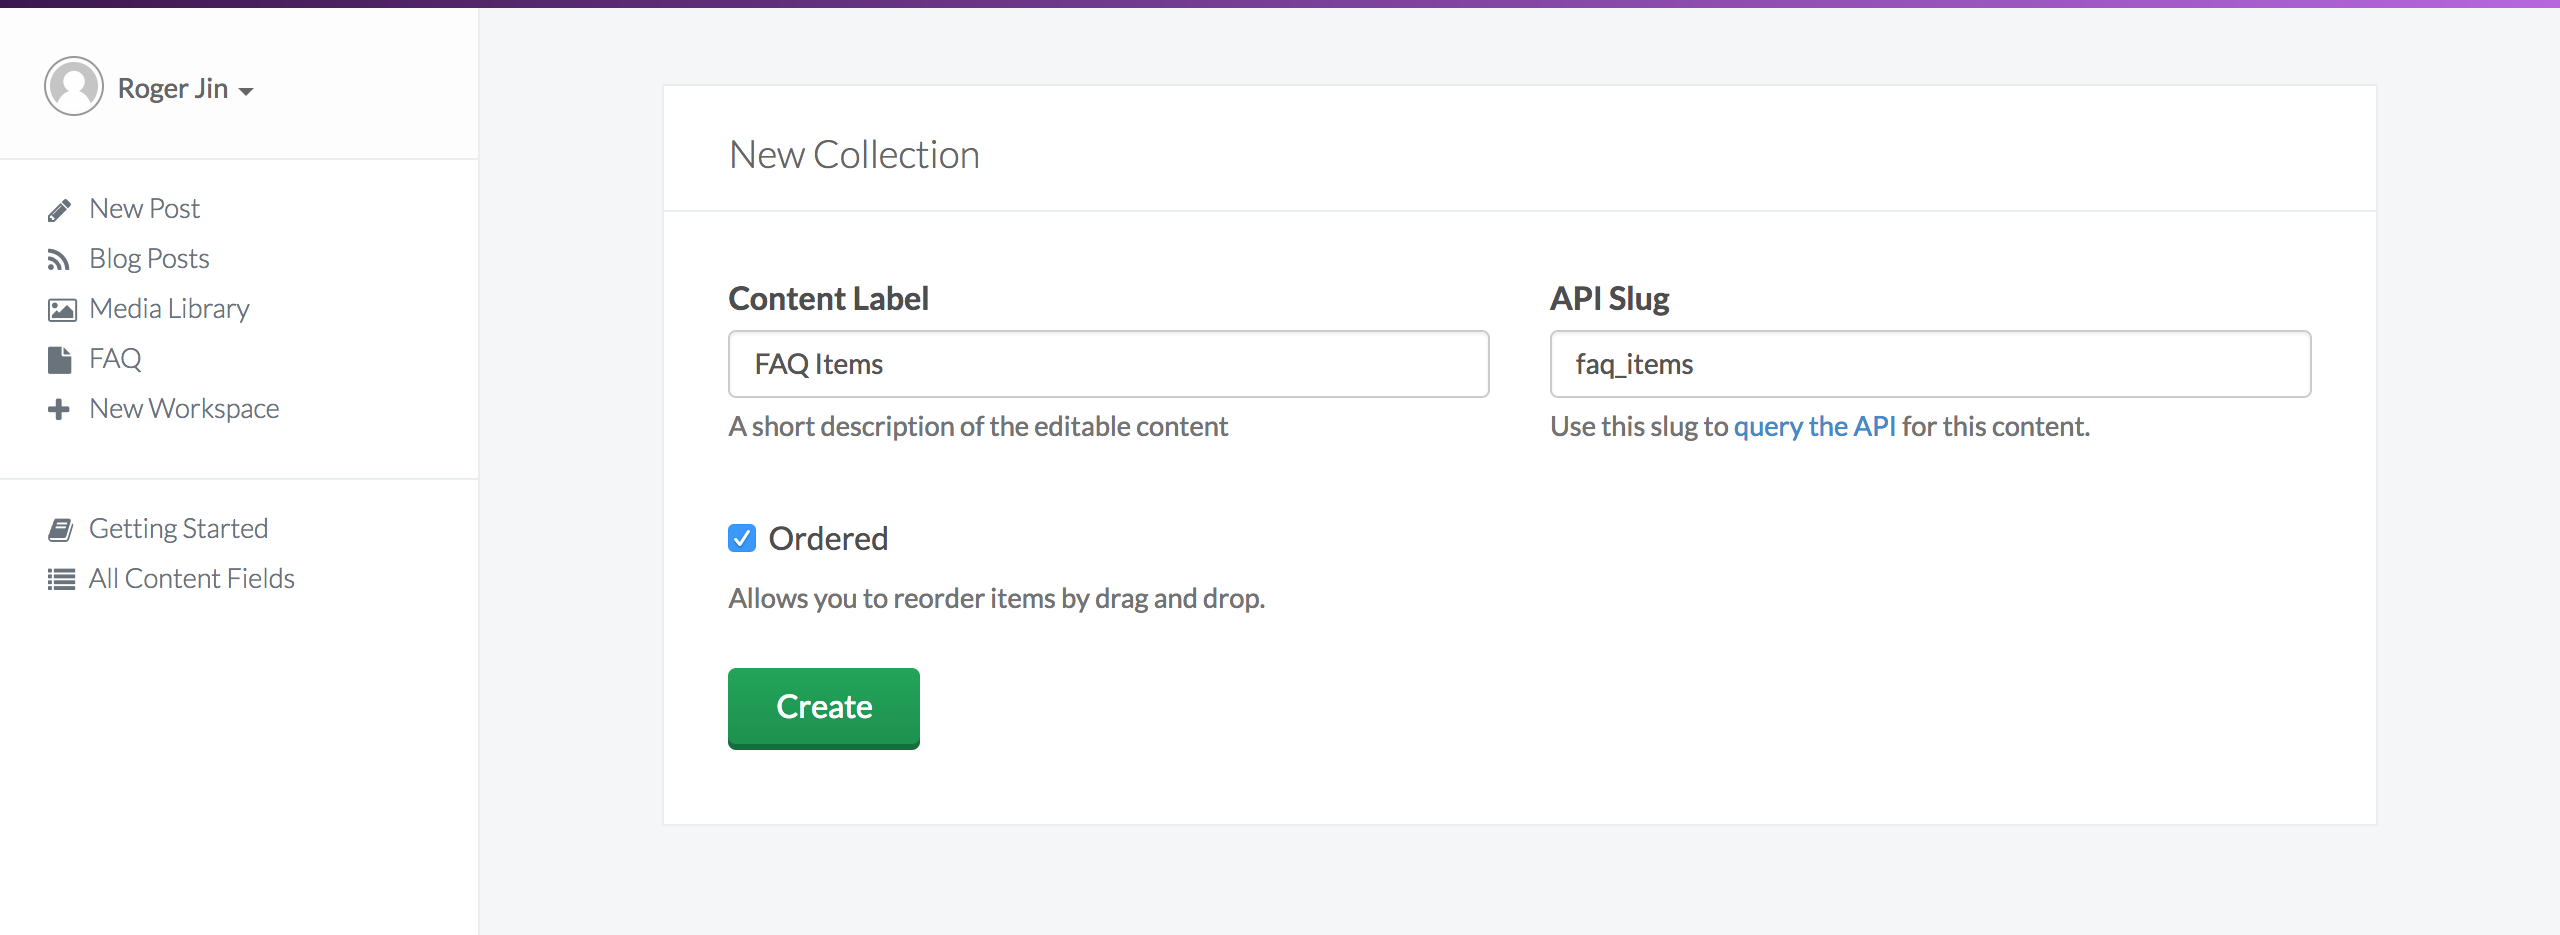
After saving, add another field but this time choose the “Collection” type and name the field FAQ Items:
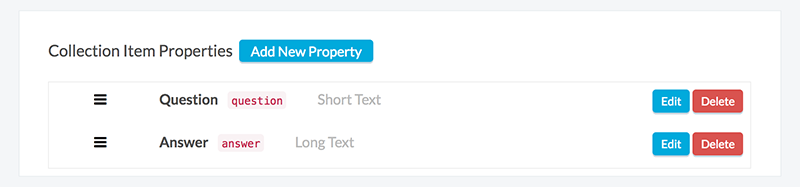
On the next screen setup two properties for items in the collection:
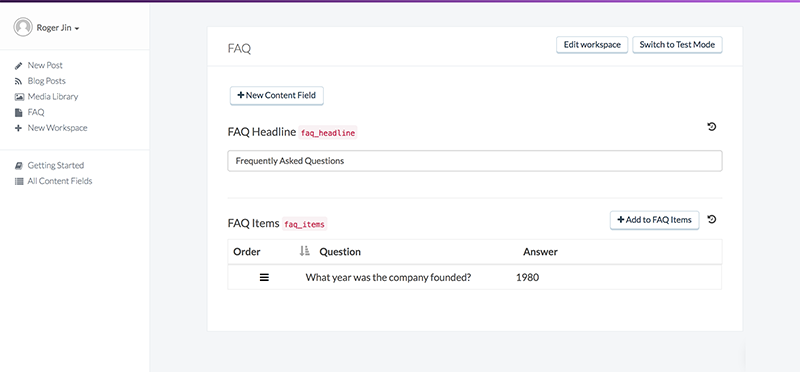
Now go back to your workspace and update your heading and FAQ items.
Integrate into your application
Blog
Introduction
ButterCMS is also a great feat if you want to spin up a blog, which you can do through their provided blog engine that helps you manage content in one place. Gatsby then pulls down the data at build time and create static pages off that data.
Blog home page
Now you will create a home page for your blog posts. It basically lists all blog posts.
Creating a blog template
Now you’ve listed your blog posts in src/pages/blog.js, using gatsby createpages API you would generate blog post pages using a template:
Generate blog pages
Now you’ll use the blog template defined in src/templates/blog-post.js to generate blog pages.
Categories, tags, and authors
Use Butter’s APIs for categories, tags, and authors to feature and filter content on your blog. See their API reference for more information about these objects:
Easy as Butter
This was an example meant to help you understand how ButterCMS works with Gatsby. You’re now able to:
- Create a ButterCMS repository and set it up together with the Gatsby plugin
- Query data from ButterCMS for single pages, multiple pages, blog posts, and custom content fields
If you got stuck, you can compare your code to the gatsby-starter-buttercms. To learn more about ButterCMS, check out their blog. Their latest updates can be found on buttercms.com.