Making a Gatsby Blog with Netlify CMS
This tutorial will use gatsby-personal-starter-blog, a Gatsby starter based on the official gatsby-starter-blog. The differences are that gatsby-personal-starter-blog is configured to run the blog on a subdirectory, /blog, and comes pre-installed with Netlify CMS for content editing. It also adds VS Code highlighting for code blocks.
Prerequisites
- A GitHub account
- The Gatsby CLI installed
Set up a Netlify CMS-managed Gatsby site in 5 steps:
Step 1
Open your Terminal and run the following command from the Gatsby CLI to create a new Gatsby site using gatsby-personal-starter-blog.
Step 2
Once the Gatsby site is finished installing all the packages and dependencies, you can now go into the directory and run the site locally.
Now you can go to http://localhost:8000 to see your new site, but what’s extra cool is that Netlify CMS is pre-installed and you can access it at http://localhost:8000/admin
A CMS, or content management system, is useful because you can add content like blog posts from a dashboard on your site, instead of having to add posts manually with Markdown. However, you’ll likely want to be able to access the CMS from a deployed website, not just locally. For that, you’ll need to deploy to Netlify through GitHub, set up continuous deployment, and do a few configurations. You’ll go over this in Step-5.
Step 3
Open the project in your code editor and open static/admin/config.yml. Replace your-username/your-repo-name with your GitHub username and project name. This step is important for managing and deploying the Netlify CMS interface.
Customizing your site
Head into gatsby-config.js and you can edit your siteMetadata, add a Google Analytics tracking ID, and your app icon/favicon. Test out the edits for the deployed build by quitting the development server and running gatsby build && gatsby serve.
You’ll likely also want to edit the README.md and package.json files to include your own project details.
Step 4
Open github.com and create a new repository, with the same name as your project. Push your new Gatsby site’s code to GitHub using the following Terminal commands:
Then, open app.netlify.com and add a “New site from Git”. Choose your newly created repo and click on “Deploy site” with the default deployment settings.
Note: if you don’t see the correct repo listed, you may need to install or reconfigure the Netlify app on GitHub.

Step 5
To make sure that Netlify CMS has access to your GitHub repo, you need to set up an OAuth application on GitHub. The instructions for that are here: Netlify’s Using an Authorization Provider.
For the “Homepage URL” – you can use your Netlify subdomain, [name-of-your-site].netlify.com, or you can use a custom domain. To customize the subdomain, look for the “Edit site name” field under “Domain Management” for your project on the Netlify app. To connect your Netlify site to your custom domain instead, see Netlify’s instructions on custom domains.
Once you’ve configured an authentication provider then you’ll be able to use Netlify CMS at your deployed site to add new posts.
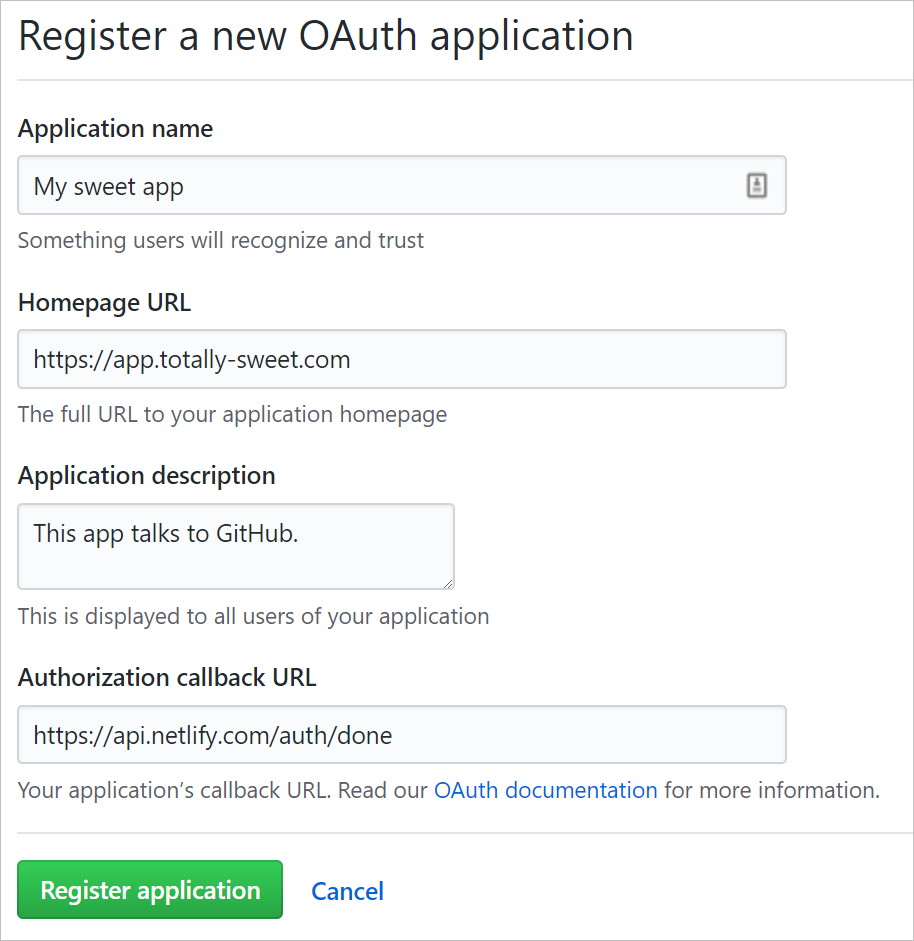
Copy the credentials of your new app listed on GitHub OAuth Apps and install a new auth provider on Netlify using them.

Benefits of Netlify CMS, GitHub, and Netlify Workflow
Congrats! Now that Netlify CMS is successfully configured to your project, every time you add a new post, the content will be stored in your repository and versioned on GitHub because Netlify CMS is Git-based. Also, thanks to Netlify’s Continuous Deployment, a new version will be deployed every time you add or edit a post.
You can learn more about Netlify CMS and how to configure it further in the Netlify CMS documentation.